Chapter 1: Getting Started
Maple is an easy to use Lightweight GUI Library written in rust that sits on top of the glfw crate. To install it we will need to add it to our Cargo.toml. To do that place the following under dependencies.
maple = { git = "https://github.com/Interfiber/maple" }
Now to compile maple into our project run
cargo build
this will compile your project with maple. Now that its compiled we can create our first window in the next chapter.
Chapter 2: Our First Window
Creating a window is easy! First n your main.rs file select every thing and delete it. Now that we have a clean workspace we can add some window code. Use the following to create a window. I will tell you what everything does in just a moment
use maple::*;
fn after_load(place_holder: String) -> String{
	return place_holder;
}
fn main(){
	let win = Window {
		title: String::from("My Awsome Window!"),
		height: 400,
		width: 400,
		name: String::from("Maple Test")
	};
	win.start_window(after_load);
}
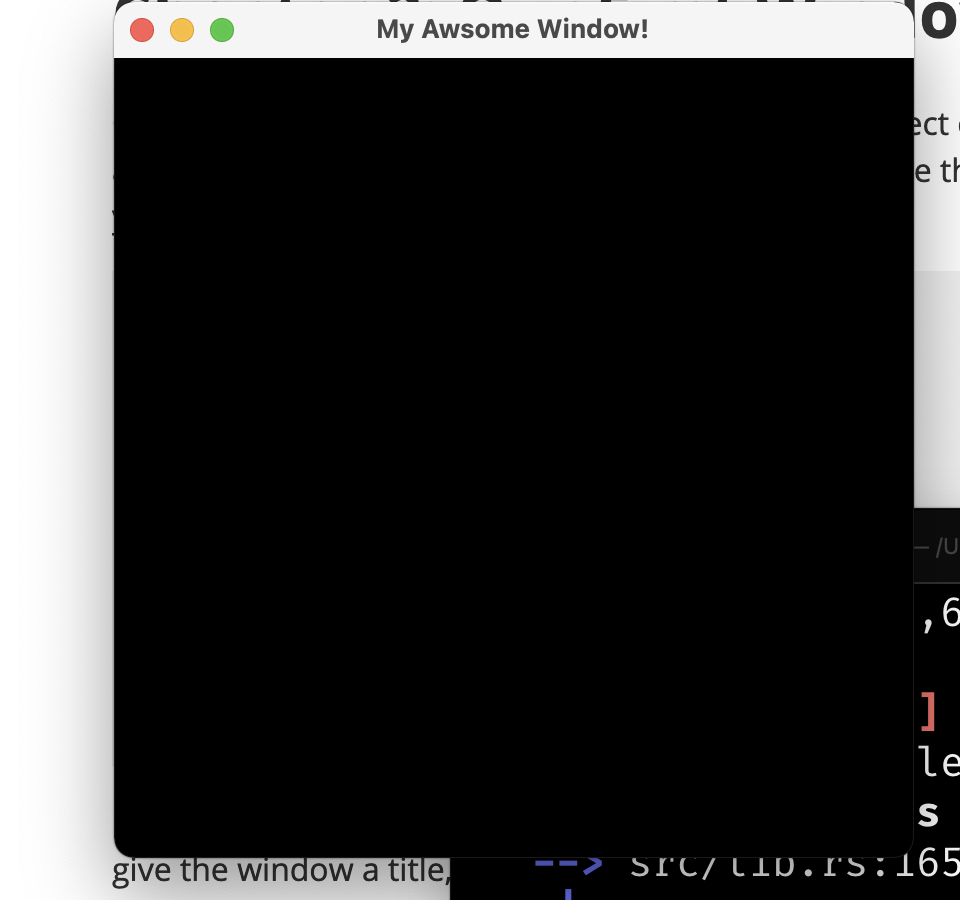
Now lets find out what this does. In the main function we declare a "Window" object name "win". We give the window a title, a height, a width, and a name. Then we create the window with "win.start_window" then we pass in the "after_load" function which will run after the window is create on another thread. To run our program open your terminal and type
cargo run
Now a window should popup that looks like this:
Chapter 3: Cursors Oh My!
If you want your window to have a different cursor type like a finger cursor supplied my the OS. Or a custom cursor from an image maple has support for that.
Cursor Types
Below is example code for using cursor types.
use maple::*;
// This function will be ran when the window loads
fn after_load(place_holder: String) -> String{
	return place_holder;
}
fn main(){
	let win = Window {
		title: String::from("My Awsome Window!"),
		height: 400,
		width: 400,
		name: String::from("Maple Test")
	};
	win.set_cursor_type("crosshair");
	win.start_window(after_load);
}
This will set the cursor type to the crosshair cursor. But heres a full list of supported cursors
- "hand"
- "crosshair"
- "default" If you provide an incorrect cursor name you will get the default cursor for your OS which is the arrow. The line that has "win.set_cursor_type" on it it the line that sets the windows cursor.
Custom Cursors
The default cursors are fun and all but how about one that comes from an images. The code below will change the windows cursor to become an image
use maple::*;
fn after_load(place_holder: String) -> String{
	return place_holder;
}
fn main(){
	let win = Window {
		title: String::from("My Awsome Window!"),
		height: 400,
		width: 400,
		name: String::from("Maple Test")
	};
	win.set_cursor_image("cursor.png");
	win.start_window(after_load);
	win.cleanup();
}
This code will set the cursor to the image from "cursor.png". You will also see the cleanup function. This will remove some cursor caches generated at runtime. In this case it will delete a file called maple-cursor-image.png
Chapter 4: Fullscreen windows
If you want a window that is fullscreen in maple its really easy. You can use the following code to make a fullscreen window
use maple::*;
fn after_load(place_holder: String) -> String{
	return place_holder;
}
fn main(){
	let win = Window {
		title: String::from("My Awsome Window!"),
		height: 400,
		width: 400,
		name: String::from("Maple Test")
	};
	// Set window to fullscreen
	win.set_fullscreen();
	// Create the window on the screen
	win.start_window(after_load);
}
"win.set_fullscreen()" makes the window fullscreen